
Language server assistance#
In this section we will integrate code assistance through the clangd language server. Moreover we will also see how to create a new project.
Motivation – direct feedback in source code#
Replace your code with the following code. Use the existing project.
int main(){return n}
You should see some errors in your terminal. Do not fix them.
Wouldn’t it be much more convenient to see errors as you type? Tools exist for this purpose. We will use clangd which can pinpoint errors already on the editor and other features we will discover. This tool is included in the same package as the clang compiler we installed before.
Testing if clangd executable is available#
Switch to a normal terminal in the editor (e.g.,
powershell) by pressing any key on the 🛠️ build & run terminal.Try to run:
Windows:
clangd.exeLinux/macOS:
clangd
The command should output something similar to:
clangd is a language server that provides IDE-like features to editors....Not available?
clangdis part of the LLVM package that we installed before, so it should be available, if the compilerclangworks.Exit clangd by using
on the terminal
Installing clangd editor extension#
We will install clangd extension for our editor to be able to leverage clangd in programming:
Click on

Extensionon the leftmost bar. Extensions bar should show up.Using extensions we can add extra functionality to our editor.
Search for
clangd. Click onclangd(not other forks likeKylin Clangd).Click on
Install. A window will pop up asking whether you want to trust.Click on
Trust Publisher & Install.
Testing clangd extension#
After the installation, you will notice that main.c tab title became red and shows 2 which is the number of errors.
Go back to
main.ctab. You will notice the red wavy underline undern. This points to an error.Hover on
n. A small window will pop up mentioning the two errors. One of the errors can be fixed automatically usingQuick FixCtrl..Use quick fix using the shortcut. It will open up a
Quick Fixwindow and will suggestinsert ';'.Select the suggestion. You will have one error left.
Fix the last error by replacing
nwith0.Build your project again. You should see no errors.
Configuring clangd#
Previously, we created a compiler_flags.txt. This file is also read by clangd. We need an additional option to get additional helpful messages from clangd:
Open settings and search for
clangd. You should seeClangd: Arguments.Add the following item:
--clang-tidy.
Starting a new project alongside a former project#
You will work on multiple projects and you may want to use code from your former projects when you start a new project. Code can open multiple projects in a single workspace.
Follow the steps:
CtrlShiftp for command palette
enter
add folderand click onWorkspaces: Add folder to Workspace. File explorer of your OS should pop up.Beside your first folder
hello, create a new folderpi-estimator.Click
Add. You should see the new folder open in your editor’s file explorer. If not, click on .
.Copy the following from the previous folder to the new folder. You can use Ctrlc or drag the folder/file with your mouse while pressing Ctrl.
main.c.vscode/
Open
pi-estimator/main.cand press F5. The editor will ask which build task you want to run, because we have two default build tasks in our workspace.Select
build - pi-estimator.In the
Debug console, you will see that your project was run successfully.
If you F5 again, then you have to select the build task again. If you don’t want to select again and again, close the previous project:
Right click on the project folder’s name.
Click on
Remove folder from workspace.
Tip
Whenever you start a new project, think about creating a new repository for the project.
In the following we will replace the contents of pi-estimator/main.c while introducing another feature of the language server.
Autocompletion#
The language server clangd also assists us by suggesting code and completing partially written code. Let us experience this. Write the first characters of the following code – #inc and see the suggestions, then select #include <header>.
You can copy paste the rest of the code.
#include <stdio.h>
#include <stdlib.h>
#include <time.h>
int main() {
int total=1000000,inside=0;
srand(time(0));
for(int i=0;i<total;i++) {
double x=(double)rand()/RAND_MAX;
double y=(double)rand()/RAND_MAX;
if (x*x+y*y<=1) inside++;}
double pi=4.0*inside/total;
printf("Estimated pi: %f\n",pi);}
Now build & run the program. It will print an estimation of the number pi.
Formatting#
Try to recognize different sections of the code. Is the code easy to follow and read? Think a while before you continue to read.
In my opinion, the code is hard to read. It is for example hard to see which curly braces ({ and }) belong together so that we can recognize components and subcomponents of the code – in other words hierarchies.
The programmers usually pay attention where they begin a new line or put the braces and this aids readability. Compare the following code pieces.
You don’t have to replace the code for pi estimation, we will use it later.
#include <stdio.h>
int main() {
for(int i=0;i<4;i++){printf("%d ", i*i);}}
#include <stdio.h>
int main() {
  for (int i = 0; i < 4; i++) {
    printf("%d ", i * i);
  }
}
Pay attention to:
alignment of
{and}that belong togetherspacing after
;beginning a new line for a new statement like
forandprintf.
Do you agree that formatted code looks better?
Luckily the editor can format our code automatically using the language server clangd:
Click on your code.
Right click ->
Format Document. Your code should now be formatted.
Formatting usually makes our code more readable, so let us automatize formatting. The editor can format whenever we save our code:
File->Preferences->Settings. Settings will show up in a tab.Click on
Search settings.Search for
formatActivate:
Editor: Format On SaveEditor: Format On PasteEditor: Format On Type
Renaming symbols#
Another useful feature of clangd is renaming of symbols without renaming other unrelated strings. Let us try it together:
Open the code above that calculates pi.
Click near
ias follows: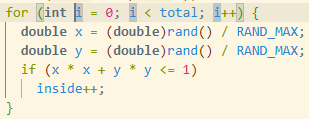
Click f2 or right-click ->
Rename Symbol. A small prompt will come up prefilled with symbol’s namei.Rename it to
j. You will see that alliare renamed, but notiin the symbolinsidebelow.
Renaming will be especially useful when we work on our code for a longer time where our code grows gradually. Then some tidying up and renaming of variable names may be needed for improving readability.