Organizing code in a repo#
Now we will learn how to organize our code on a repository primarily for keeping a diary about our work and sharing it. First we will store them in a local repository and afterwards in a remote one.
- repository
(in context of version control systems) a data structure that stores metadata for a set of files or directory structure. The main purpose of a repository is to store a set of files, as well as the history of changes made to those files.
- version control
the software engineering practice of controlling, organizing, and tracking different versions in history of computer files; primarily source code text files, but generally any type of file.
Why do we use repositories?#
Most programmers use repositories to organize their software projects, but should you – as a student in this course?
Keeping a history of changes is helpful if we or someone else who also work in the project would like to understand changes in the project which is useful for collaboration. Keeping a history helps also to roll changes back if something does not work as intended.
Keeping projects in a repository is also helpful to collaborate and share code. You will use it later to share or submit your projects. You maybe already downloaded something from the code forges GitHub, GitLab, or Codeberg. GitHub is the most popular one and on which most of the open source projects in the world are organized. GitLab is popular among companies, because GitLab is open-source. Codeberg is European and is privacy-focused.
Last but not least, pushing your code to a forge will keep a backup of your project in the cloud.
Installation#
Git is the most popular version control software. Before we can use git related functions in the editor, we have to install git using our package manager:
winget install git.git
brew install git
Repository initialization && creating the first commit#
Go back to your editor.
On the activity bar, click the
 icon.
icon. Source Controlwindow will open up.On the
Source Controlwindow, you should seeInitialize Repositorybutton. If not, clickreload.Click
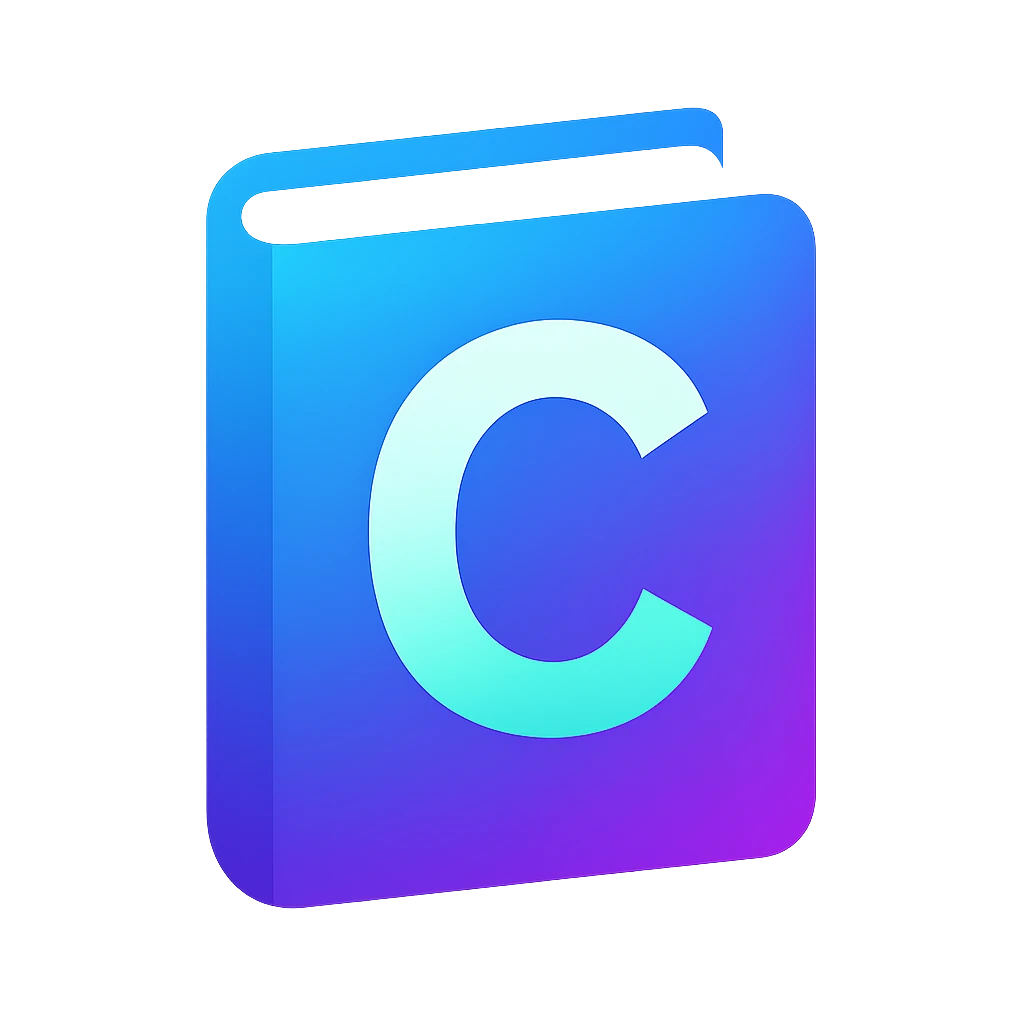
Initialize Repository.Changeswindow will show up, which should show you the following files:main.cmaintasks.jsonlaunch.jsoncompile_flags.txt
You will see
Ubeside these files.Ustands for untracked, which means these files are not tracked by the repository.Typically only source files and files for compiling the project are tracked in a repository, so we will only track
main.c,tasks.json,launch.json,compile_flags.txt, but not the compiled filemain.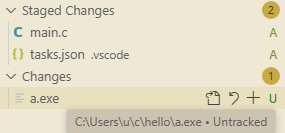
Fig. 2 Four added files (
A) and one untracked (U) file on theChangeswindow.5on the icon indicates that there are changes on 5 files.#To add these two files to the repository – or to track in other words, hover on the filenames and click the
 symbol on each. You will an
 Aon the right of the files, which stands for added as depicted in Figure 2.Click the
Messageprompt to write a commit message. When we use repositories we make our changes in commits.Ideally each commit should be a set of changes that adds one or many describable feature like improved user name handling or added robot program. The advantage is that the programmer can roll back changes if these features led to problems later. Sometimes people don’t want to put so much structuring work and use a repository as a diary and commit code at the end of the day, which is not a good practice in a professional environment.
This is our first commit, so use the message
initial.Click the

Commiticon. You will see your first commit on theGraphwindow below.
Warning
When you commit your first changeset, you may get an error about that you did not setup git username and email. Git attaches a name and email address for each commit to identify the committer.
Setup them using following commands on a terminal. You can choose any name or email. If you use your GitHub username, then the forge will link your commits to your profile.
git config --global user.name "YOUR NAME"
git config --global user.email "YOUR_EMAIL"
Sharing our repository on GitHub#
The repository we used is until now local to our computer. Now we will create a copy of the local repository on GitHub.
On the
Graphwindow, click the
Publish Branchicon. A confirmation window will pop up to sign in using GitHub.Allow. A new window will pop up with authentication code.Copy & Continue to GitHub. A new confirmation window will pop up.Open. A browser window will pop up.Create (if you don’t have an account) and login to GitHub. You will be forwarded to the
Device Activationpage on GitHub.Paste your code.
Authorize Visual Studio Codeshould come up.If the code is not available anymore, go back to the editor and start from step 1.
Click
Authorize Visual-Studio-Code. You should seeCongratulations…You can close the browser.
A window will pop up with two options — whether you want to publish privately or publicly. You will use this repository to submit your work, so: select
Publish to GitHub public repository ....You will get the notification
Successfully published ....If you missed the notification, click the
 (bell) icon in the below right corner of the editor.
Checking the forge after push#
After pushing your code, you should see the notification on the bottom left:
Successfully published the “YOUR_USERNAME/PROJECT” repository to GitHub.
To see if everything went correctly, Click Open on GitHub.
If you cannot find this notification, you can also browse github and search for your project there. If you cannot find it, you can also use the following URL template:
https://github.com/YOUR_USERNAME/YOUR_PROJECT
You should see something similar to:
YOUR_USERNAME  initial   ... 1 Commit

.vscode
compile_flags.txt
main.c
Adding a README on GitHub#
When we share work, we should also write some information about what the code is about in the README file.
We could do these steps in our editor, but we will try the web interface to demonstrate the synchronization between the forge and local repository.
Go to github and to your project repository.
On the repository page on GitHub, click
Add a README.You can write something along the lines of:
# Hello

An example program for my C programming course.
Click
Previewto see how this text will be rendered.Commit changes....Commit changeswindow will pop up.You can leave the automatic commit message.
Commit changes. You will be forwarded to your main repository page.
Synchronizing repositories on the code forge and local computer#
You can close GitHub.
We made changes on GitHub, which are not visible on the repository on our computer.
On the editor, if you have a notification about:
Would you like ... to periodically run "git fetch"?. ClickYes, unless you prefer manually pulling the changes. If you don’t see the notification, then search forgit.autofetchin settings and activate it.This setting will automatically get the project updates from the forge. This is useful when we collaborate or edit our code on different platforms, e.g., local computer, web-based IDE or on the forge.
Auto-fetch will automatically download the changes you have done on the forge every 3 minutes. After some time you should see that the blue

mainicon will be below the violet
origin/mainicon. If not, you manually fetch using the icon.
icon.
The different levels of the ![]() and
and ![]() icon means that your repository downloaded the changes from the forge, but they are currently not applied. The application operation is called pull.
icon means that your repository downloaded the changes from the forge, but they are currently not applied. The application operation is called pull.
To pull the changes, on the
Graphwindow, click
Pullicon. Now the icons and will be on the same level.
When should we create additional commits?#
After you have a meaningful progress on your project, then you should create a commit. Let us take this website as an example. These course materials are also organized in a repository. When I begin working, a have typically a goal, e.g., I want to write a new section about Organizing code in a repo in the file organizing-code-in-a-repo.md. In the process of writing this section, then I may also have to modify other already existing files like first-project.md and ide-installation.md. When I am finished, my changeset will consist of the modifications in first-project.md and ide-installation.md, and the new file organizing-code-in-a-repo.md. Then I would stage these three changes and write a commit message like:
new section: Organizing code in a repo
Finally I would commit and push my changes.
Adding additional commits in the editor#
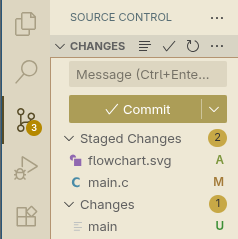
Fig. 3 Two staged files after our initial commit.#
Now we will create commits in our editor ourselves. Let us assume you have an initial commit that contains your initial C project. You modified your main.c by formatting the code and added the flowchart image flowchart.svg that documents your code.
On the activity bar, click the
icon. Source Controlwindow will open up.Hover over one file that you want to stage before committing, then click the
symbol. Repeat this for each file you want to stage.In our case we want to add
flowchart.svgandmain.c.After staging, your Changes window should look like Figure 3.
Write a descriptive message, e.g.,
formatting & flowchart
Click
CommitorCommit & Push. The latter is under the icon.
icon.
Which files belong to the repository?#
Only add source files and project files which are relevant to compile and run your code to the repository. Files generated from source files usually do not belong to the repository, e.g., *.exe, log files etc. Some reasons are:
A repository is typically used to track changes in text files, because text files consists of readable lines which can be easily differentiated between commits.
We want to keep our repository minimal to avoid complexity. If some files can be easily generated using the source files, we have less amount of files by avoiding generated files.
.gitignore for hiding files that do not belong to the repo#
We did not stage one of the files in Figure 3 – main (main.exe on Windows). We should never commit an executable file, so hiding it forever from git changes would be more convenient.
You can ignore it by following the steps using the .gitignore file:
Click the
 icon on the sidebar.
In the root of your project, create a file named
.gitignoreand open it.Add the following line
main.gitignorecontains the names of files or folders which should be ignored by git.Save the file. You will see that the green U symbol right to the
mainwill vanish andmainwill also be grayed out.The graying out helps with focusing on source files instead.
Click the
icon. You will see that maindoes not show up anymore.Stage
.gitignoreand commit (and push) your changes.
Getting the forge link for submissions#
Each commit is like a snapshot of your project. In a metaphorical sense, you take a photo of your project in each commit and this photo does not get lost. Each commit receives an individual numerical id which identifies the snapshot.
You should use a snapshot of your work instead of the latest version when submitting your work. By submitting the snapshot link you can continue working on your project. Moreover it will be a proof that you submitted your work before the deadline and are fair to other students.
Manually#
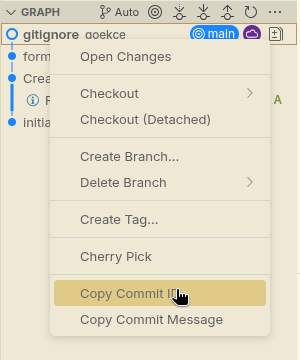
Fig. 4 Copy commit id option upon right clicking a commit#
We will build a snapshot link using the commit id and GitHub’s URL.
First let us get the commit id. The commit id is a unique name for a commit that also describes a snapshot of our project.
Click the
icon.Look on the Graph, which lists your commits.
Right click the commit that corresponds to the project version you want to submit. You will probably choose the latest commit.
Right click the commit and click
Copy Commit IDas shown in Figure 4.
The snapshot link consists of the commit id and the forge prefix. For example if we break the following snapshot link down:
https://github.com/goekce/CurrencyConverter/tree/f60a350130ec8f3633b68e6e65f3504f17a2cda1
link component |
description |
|---|---|
|
forge |
|
username |
|
project |
|
indicates that you want to view the file and directory structure |
|
commit id |
You have to fill username, project and commit id with your own data and submit the resulting link.
Using the web interface#
Go to your project on github, if you cannot find it it should be under
https://github.com/USER_NAME/PROJECT_NAME, e.g., goekce/CurrencyConverter.Assuming that you want to the get the commit id of the latest commit: Click the latest commit id shown in the following screenshot:

Fig. 5 Mouse pointer near the latest commit id on GitHub.#
You will be forwarded to the commit page which details the changeset.
Click the top right
Browse filesas shown in the following screenshot:
Fig. 6 Mouse pointer on the
Browse fileson GitHub.#You will be forwarded to the address that you can use for submission, which should have the pattern shown in the previous section.