Reading & exercises
(2.5 h) reading with exercises scattered between the text + (20 min) self-review exercises
Read the chapter and do the exercises in Chapter 2 of the book:
until page 132, including exercise 2.6.
2.7 Secure C programming is optional.
Coding environment continued
(30-60 min)
Compiler installation
We will use the Clang compiler[2].
Open a terminal and prompt:
winget install martinstorsjo.llvm-mingw.ucrtbrew install llvmCompiler test
In your terminal, type:
clangYou should see a message similar as follows:
clang-XX: error: no input files🛟 Problems?
If clang does not show the previous message and clang cannot be found, try the following in order:
Uninstall all LLVM installations using Windows
Add/Remove programs.[3]After you have uninstalled all LLVM installations, install the compiler again:
Now close and open your terminal and try to compile again. If problems persist, continue with the next step.
In this step, we will manually check whether
Pathenvironment variable includes the Clang directory. If it does not, you should add it:To add the LLVM binary folder to the path of your environment to make its tools available on every command prompt:
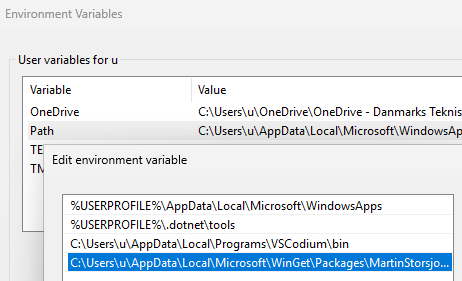
Figure 1:The selected line shows the path created by
winget install martinstorsjo.llvm-mingw-ucrtin the list of directories forPath.Here are the instructions for editing your
Path.[4]WindowsmacOSOpen start menu and open
Edit environment variables for your account.Environment Variableswindow should pop up as shown in Figure 1.In
User variables for user, edit the variablePath.Click
New.Find the binary folder of the tool that you install and enter it, e.g.,
C:\Program Files\LLVM\binClick
OK.Edit environment variablewindow will be closed.On the
Environment Variableswindow, clickOK.
The following is not tested. Give me feedback!
Open a terminal. A terminal should show up with the current working directory set to your home folder.
type:
open .zshrcAn editor should show up opening the configuration for
zsh, the default shell program in macOS.Modify path variable by prepending it with the path that you want to add. For example to add
/new/path:export PATH="/new/path:$PATH"Save the file.
First find where the compiler is installed. In Windows, the
martinstorsjo.llvm-mingw-ucrtpackage installs the executables includingclangunder the following path:C:\Users\YOUR_USERNAME\AppData\Local\Microsoft\WinGet\Packages\MartinStorsjo*\llvm-mingw-20*\binNote the
YOUR_USERNAMEand*placeholders for your specific username and version, respectively, so do not copy paste but click through the folder using the file explorer.
Extensions for the editor
In your terminal run[5]:
codium --install-extension GitHub.vscode-pull-request-github --install-extension llvm-vs-code-extensions.vscode-clangd --install-extension vadimcn.vscode-lldbGit installation
We will use Git to communicate with the repositories on GitHub.
Open a terminal and run:
winget install git.gitbrew install gitAfter installation, set your name. Use the mail address you used for GitHub.[6].
git config --global user.name "YOUR NAME"Then your email:
git config --global user.email "YOUR_EMAIL"Folder structure for the semester
Every project, will have its own folder and repository, e.g., repository1 and repository2. Based on this, my recommended directory structure is:
📁 your home folder, e.g., /Users/u/
├── 📁 Desktop
    ├── 📁 uni
        ├── 📁 26WS
            ├── 📁 cprog
                ├── 📁 code
                    ├── 📁 repository1
                    ├── 📁 repository2
                    ├── 📁 ...
You can create this structure using the following command in terminal:
mkdir Desktop\uni\26WS\cprog\codemkdir -p Desktop/uni/26WS/cprog/codeRunning programs in the editor
Start the editor.
Open a terminal using the menu
Terminal→New Terminalor CtrlShift`: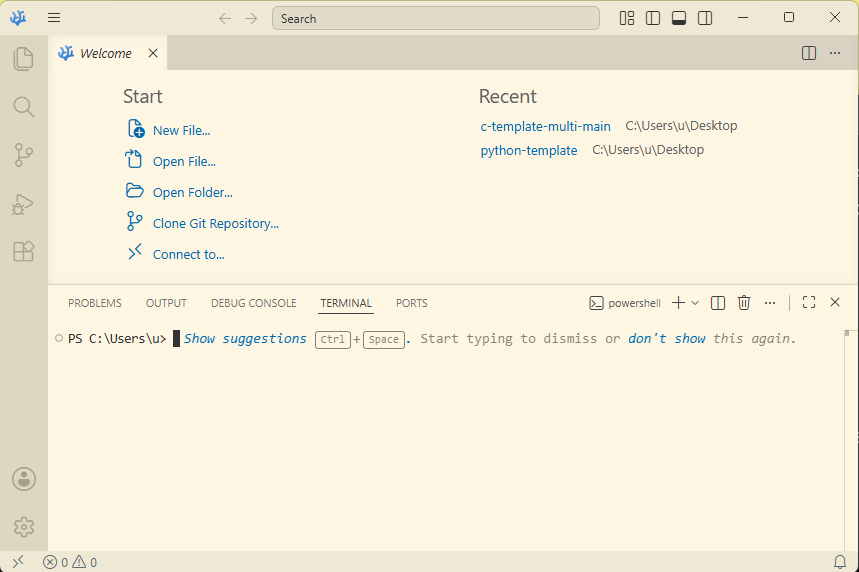
The following command will change your directory to your
codefolder and clone the template repository into yourcodefolder. Change the path to yourcodefolder if you have a different structure.In the terminal, change your directory to the
codefolder:cd Desktop/uni/26WS/cprog/codeAnd then copy the template repository into your
codefolder, calledclone:git clone https://github.com/dtucprog/c-template-multi-mainAfter cloning, you should see:
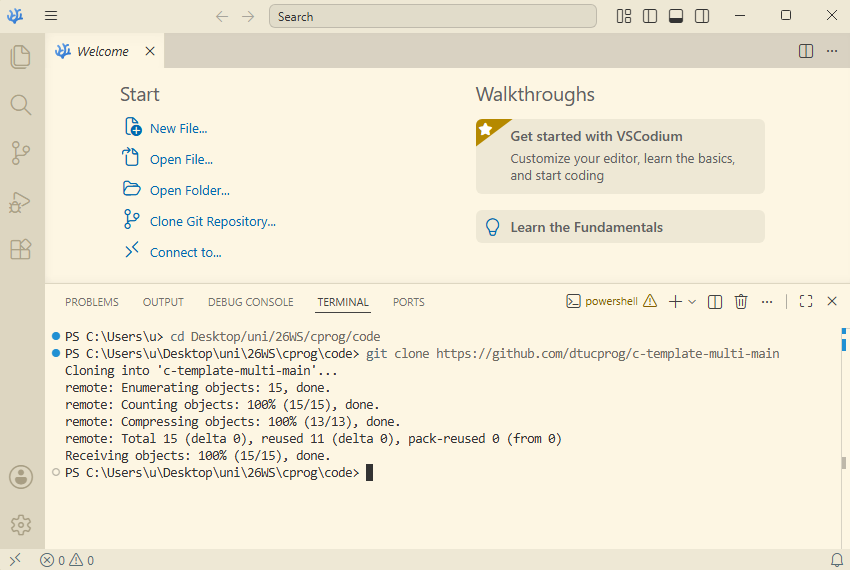
In our editor, opening a project means opening the folder containing the projects files. These are in our case
repository1,repository2, and notcodefolder.Open the folder that we cloned with git in the editor using File -> Open Folder:
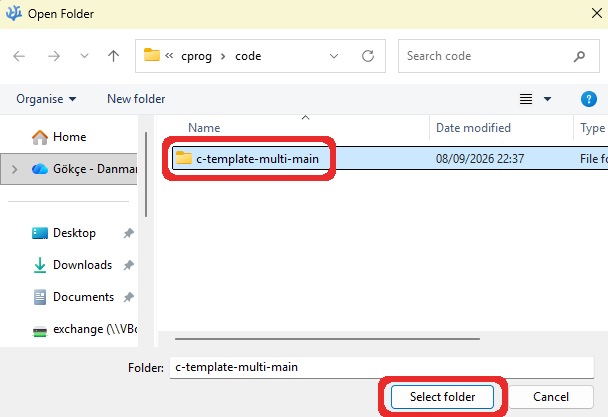
We trust each other, so click Manage

Click Add Folder instead of Trust to trust the whole
codefolder[7]: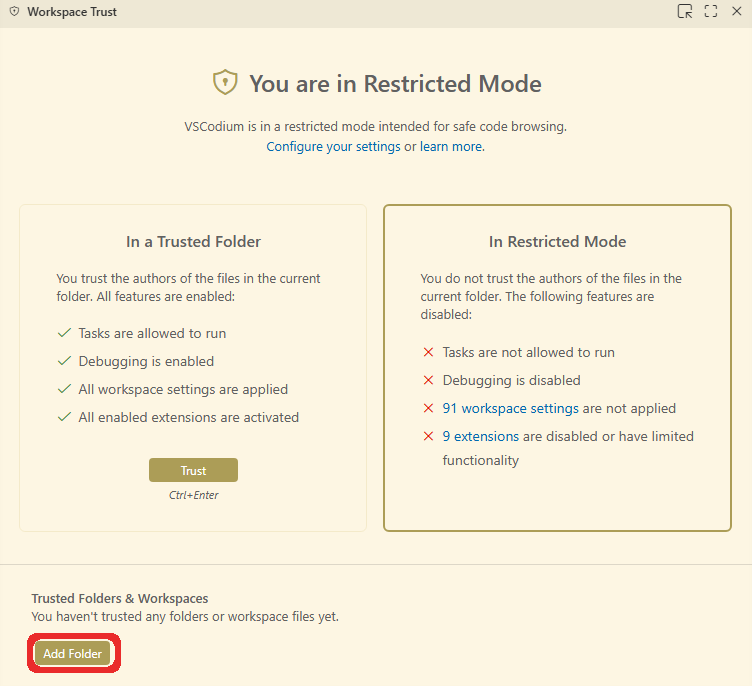
Select the
codefolder and click Trust Folder. You should see: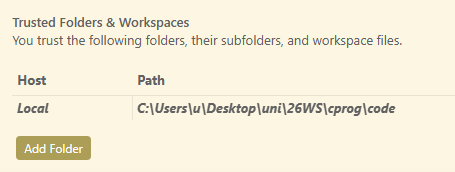
Close Workspace Trust window.
On the left activity bar, click
 Explorer and click the folder src-> hello.*.
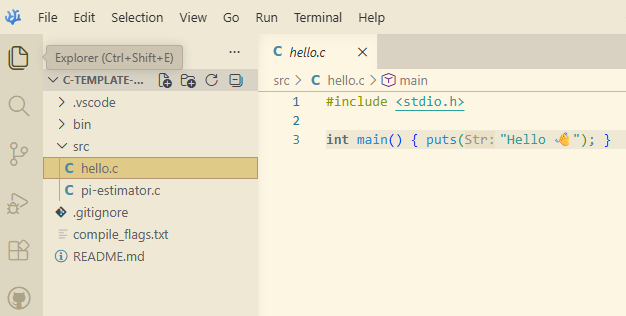
We will now build and run the code using the debugger. Press F5 or Run -> Start Debugging. You should see:
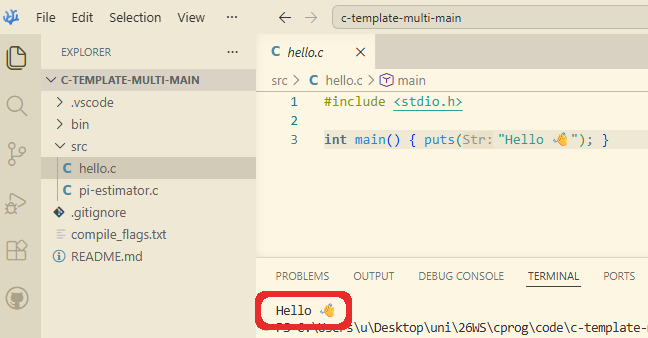
If you don’t see the emoji on Windows, refer here: Configuring PowerShell for rendering special symbols.
You can also try a program with input. Click the file pi-estimator.* and run it.
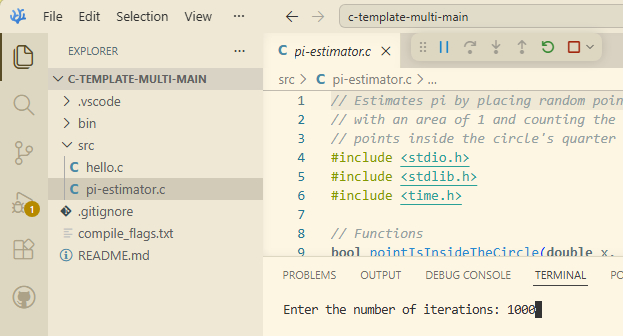
The assignments will have their own repository, which you will clone into your code folder. We will practice this in the next lecture.
🏆 Congratulations!
Because we will add additional repositories to the
codefolder.We use clang instead of the other popular gcc compiler, because clang’s error messages are more helpful for beginners.
You can also use
wingetto uninstall the package, but we made the experience that some packages which were installed with administrator rights fail to be uninstalled when you try withwingeton a user terminal.winget remove "LLVM MinGW (UCRT runtime)"An alternative tutorial with screenshots is here: https://
www .wikihow .com /Change -the -PATH -Environment -Variable -on -Windows These are for convenient GitHub authentication, code completion and debugging, respectively.
Some microprocessors have destructive read, e.g., in their timers.